At a Glance
Goals
- You are able to create an Azure Static Web App.
- You are able to publish a static website.
Prerequisites
- Access to a Subscription is already available.
- The role
Unibe-Application-Owner (mg-unibe)for the Subscription is already assigned.
References
For publishing a static website, the service Azure Static Web App is well suited. The service is cost-effective and offers numerous features. An overview can be found in the Service Description.
In this tutorial, a simple website is published using this service. The procedure is divided into the following steps:
- Provision the infrastructure (initial, one-time)
- Publish content - the website - (repeated for changes)
This sequence – first provisioning the infrastructure, then deploying the content – is a pattern frequently applied in the cloud.
Provision the infrastructure
-
Log in to the Portal and click
Create a resource.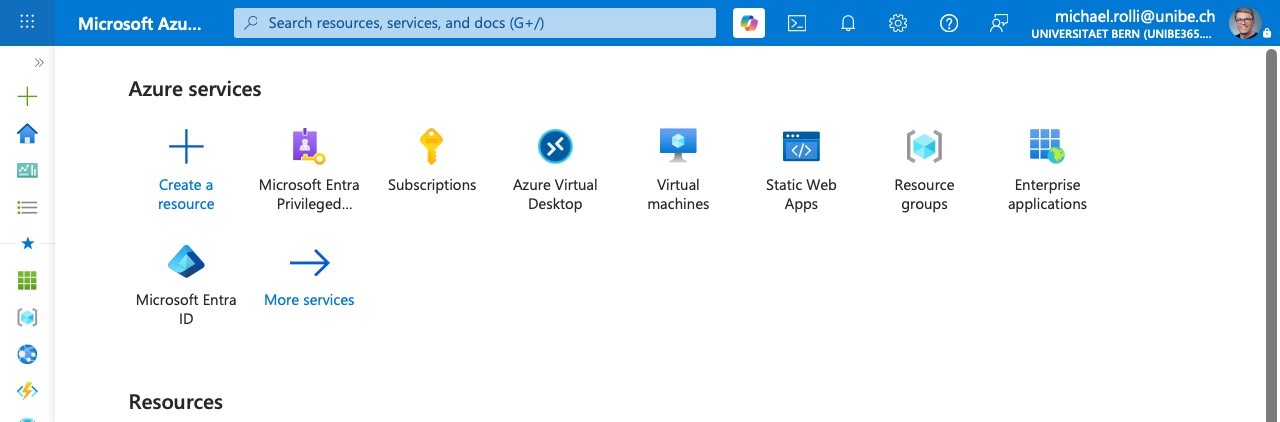
-
In the Marketplace, search the search field for
static web app(1) and, for the displayed service Static Web App, clickCreate -> Static Web App(2).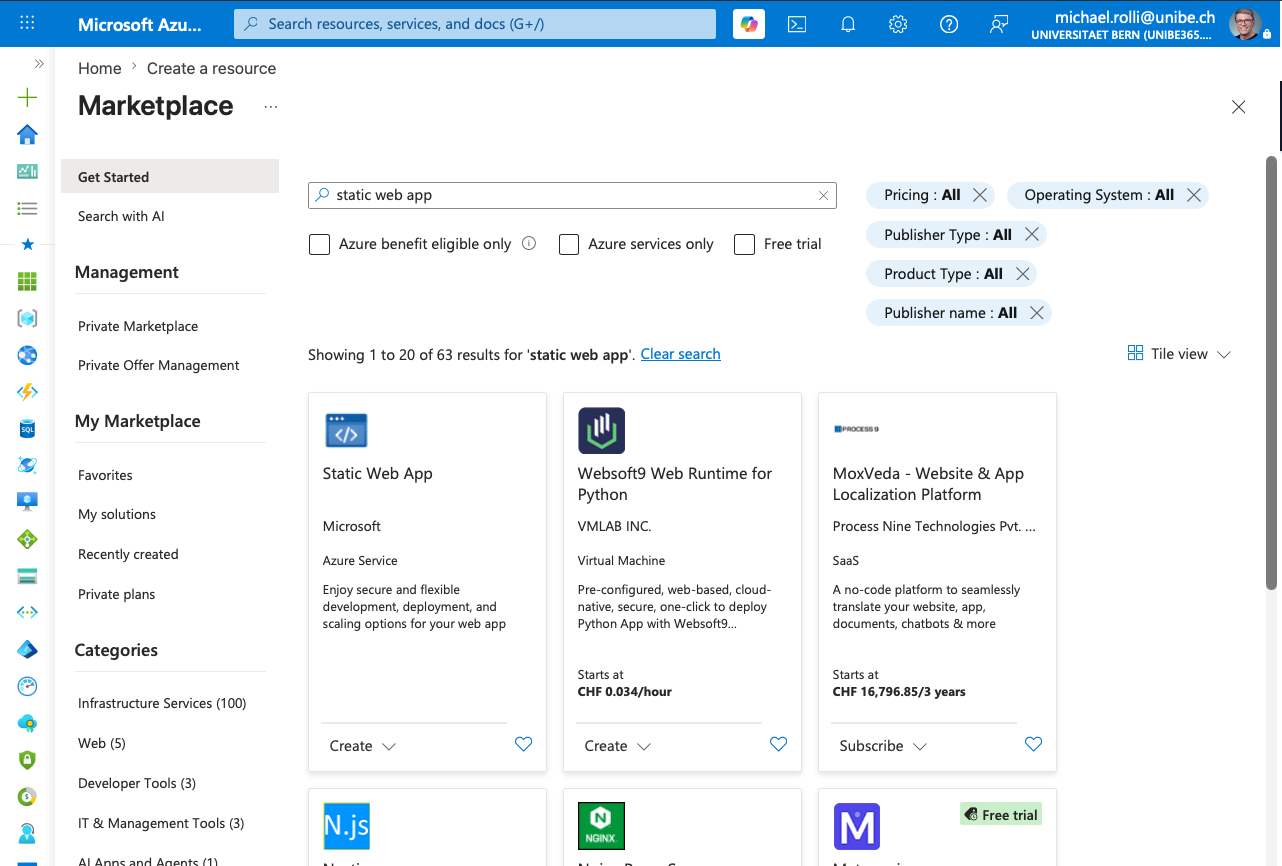
-
In the form
Create Static Web App, in the sectionBasics, apply the following adjustments:a. Select the Subscription in which the static web app is to be created.
b. Select a Resource Group; in the example a new Resource Grouprg-beko-testis created.
c. Define a name for the static web app; in the examplestapp-beko-test.
d. The plan type defines the feature scope and the cost; in the exampleFree Tieris selected.
e. As the source for the website, selectOtherin the example so that in a later step the website can be published from a local computer.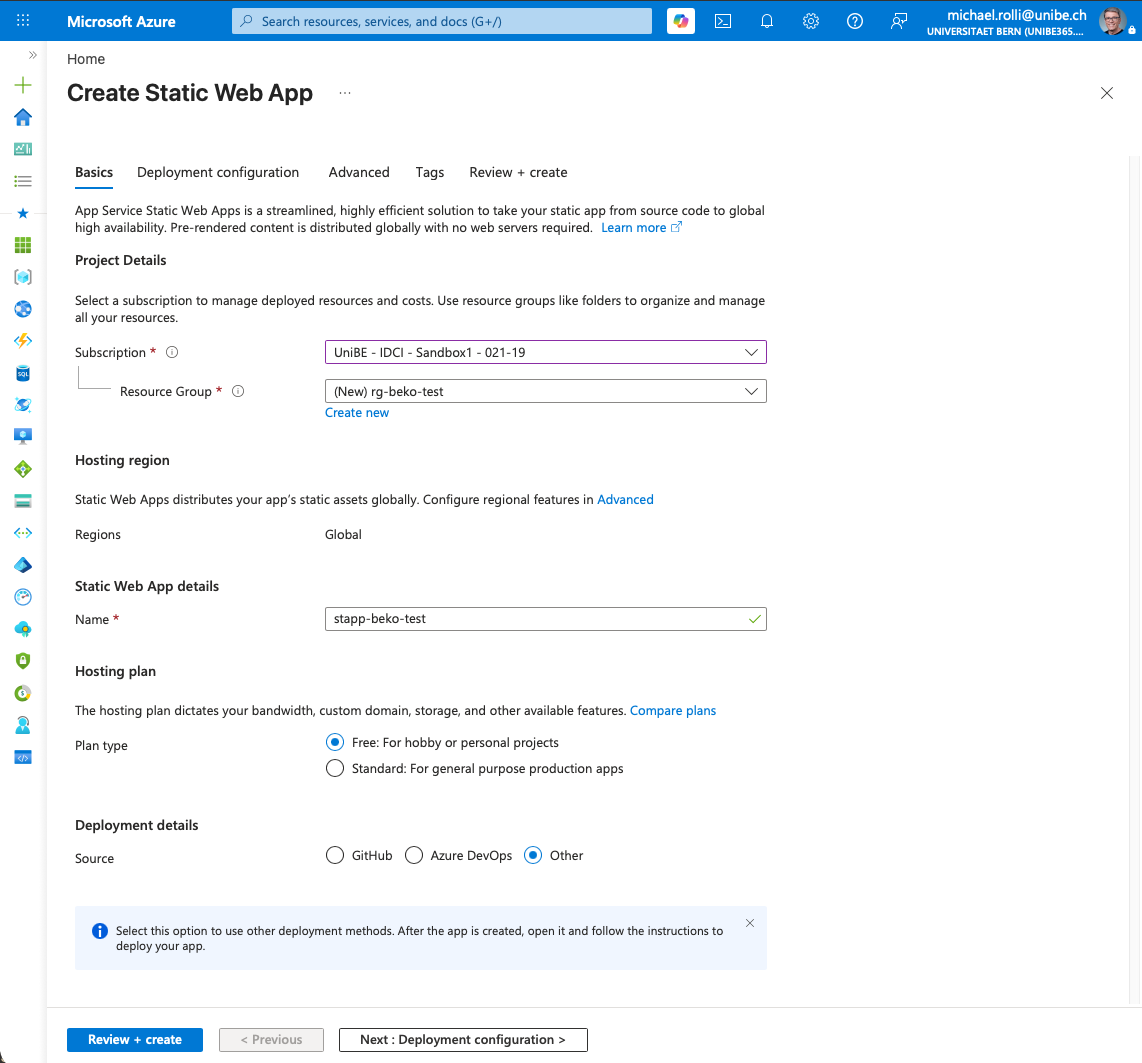
-
In the section
Advanced, set theRegion for Azure Functions API and staging environmentstoWest Europe. Finally, clickReview + Create.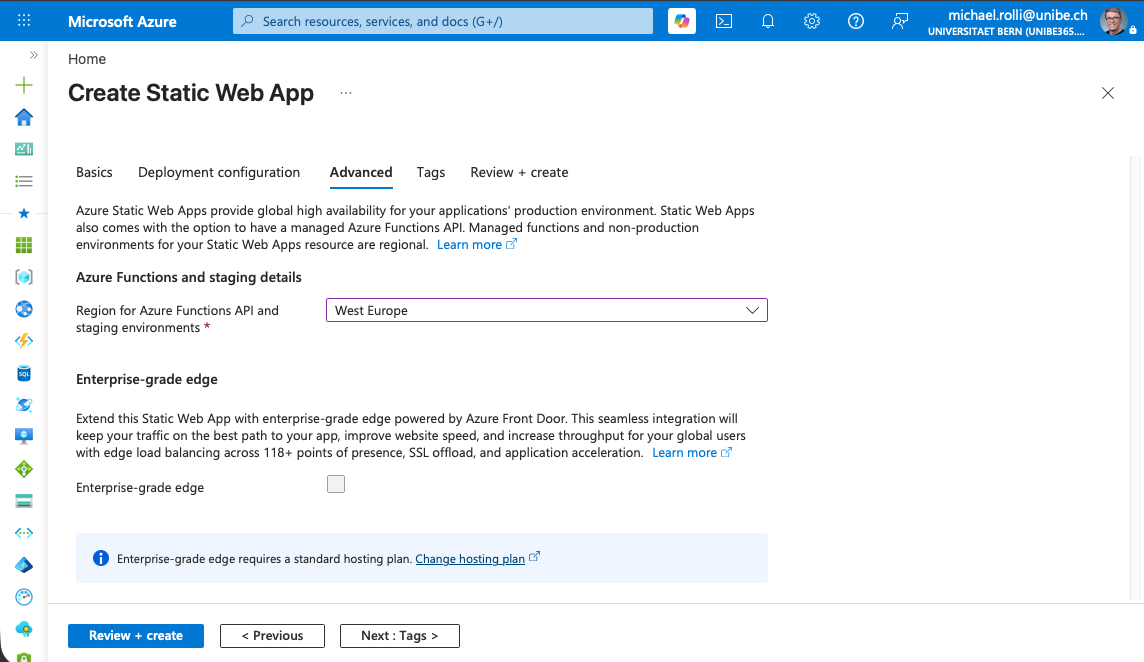
-
An automatic validation is performed and a summary is displayed. To create the static web app, click
Create.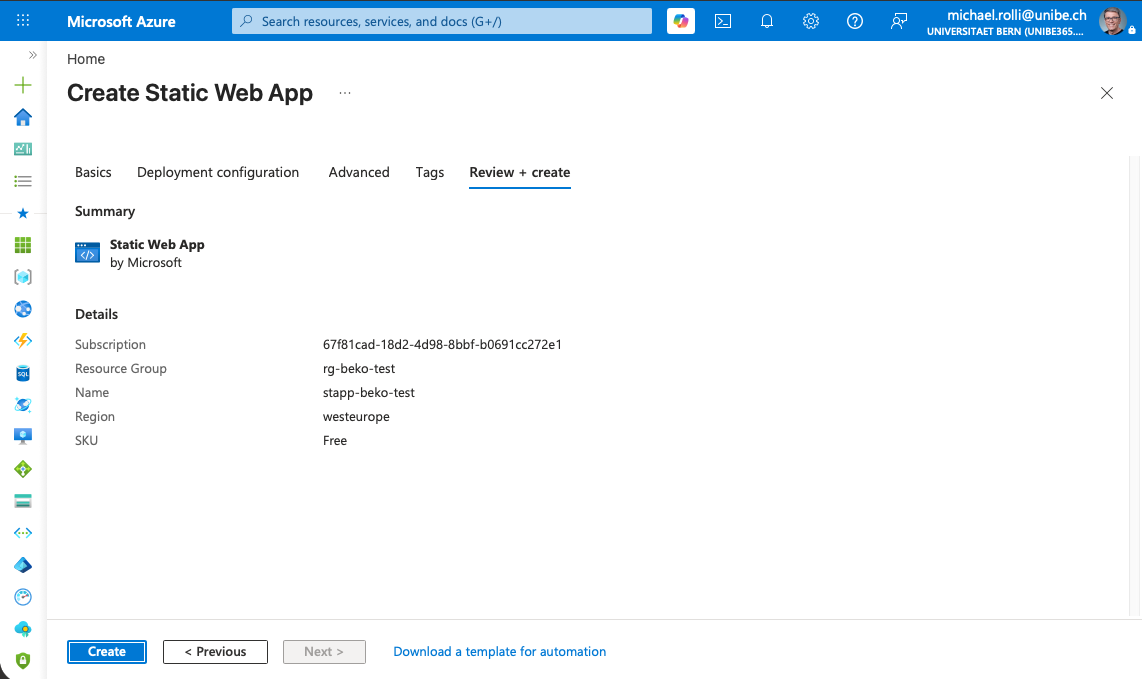
-
The provisioning of the resources can subsequently be tracked live. Once the operation is complete, a summary is displayed. To switch to the newly created web app, click
Go to resource.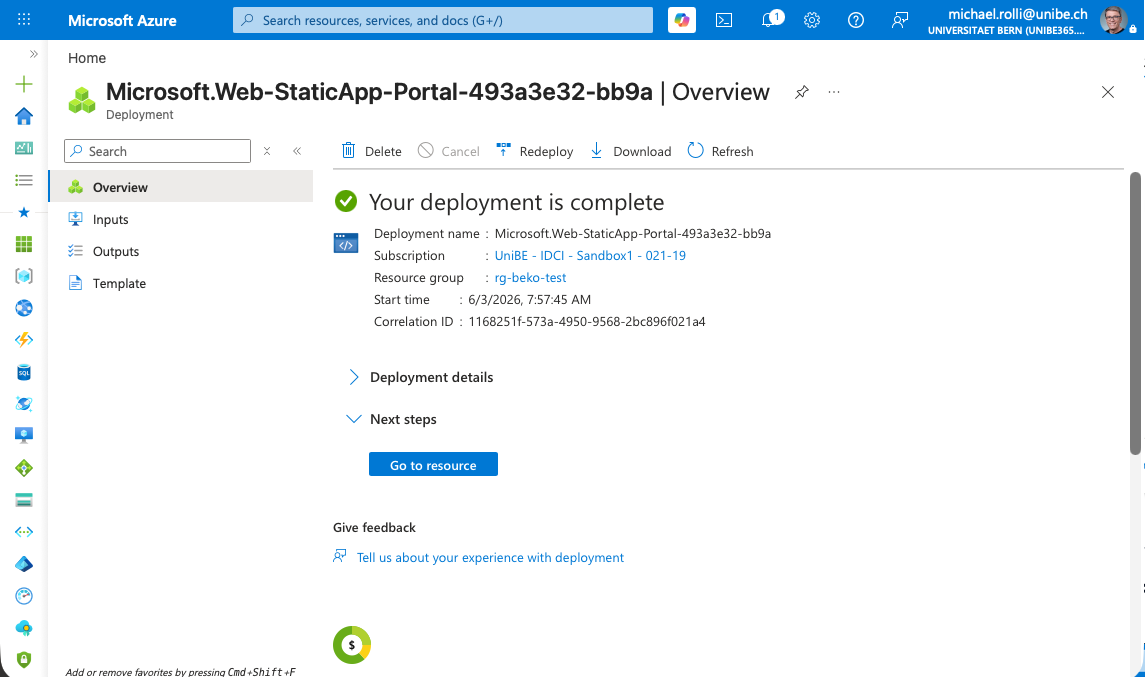
-
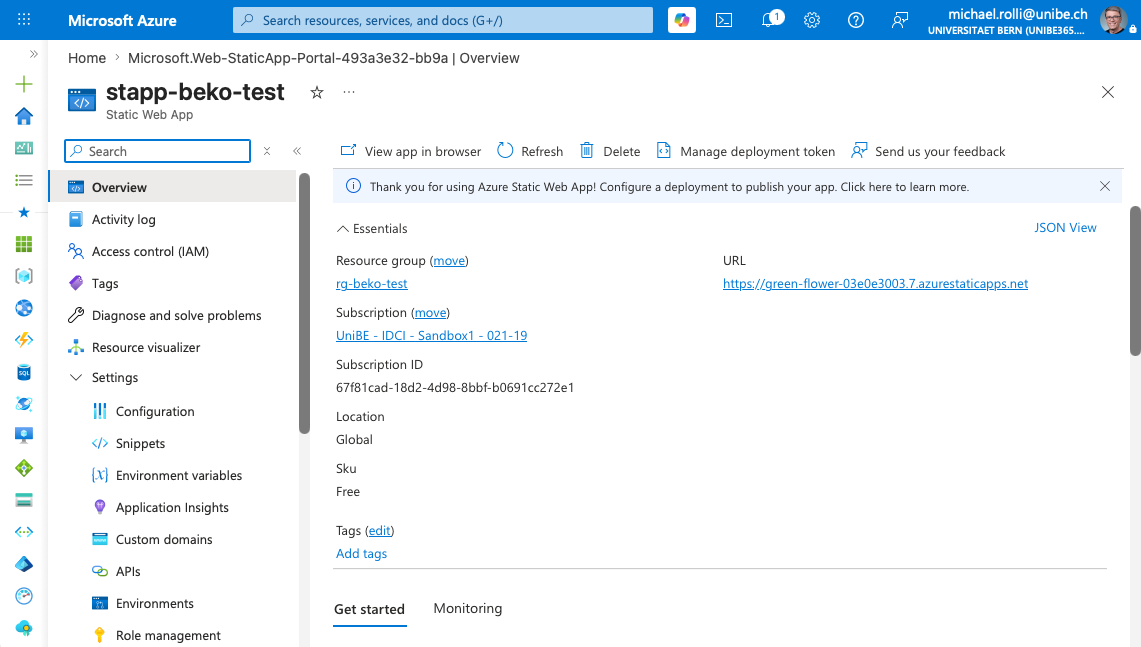
In the overview of the newly created static web app, all parameters are visible. In particular the URL under which the static website is subsequently published, as well as the function
Manage deployment token. To display the token, click this button.In the left navigation, additional configuration tools are available, with which further features such as authentication with Entra, custom domains, database connections etc. can be implemented.
-
Copy the deployment token to the clipboard. This token is required in the course of this tutorial for publishing the website.
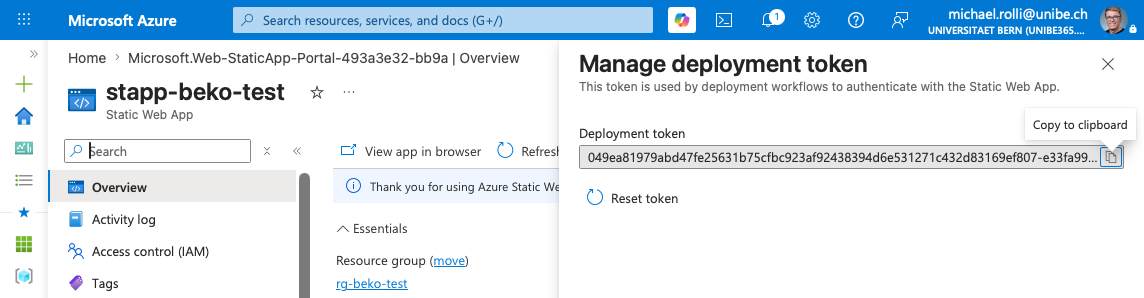
With this step, the provisioning of the infrastructure is complete. The infrastructure is fully managed by Microsoft.
The initial publication of the website follows. For changes to the website, these steps are to be performed again.
Publish the website
In this tutorial, the website is intentionally not published from a Git
repository, even though this is recommended. The website is published directly
from a folder on a client. For this, the command-line tool swa is required,
which is to be installed once according to the instructions.
In this example, the website consists of only a single page index.html in a
folder dist:
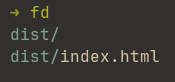
The following command publishes the website to the previously created static web app. The deployment token both identifies the web app and serves as authorization for the access.
SWA_CLI_DEPLOYMENT_TOKEN=<TOKEN> swa deploy dist
When the command is executed as specified, the output looks as follows:
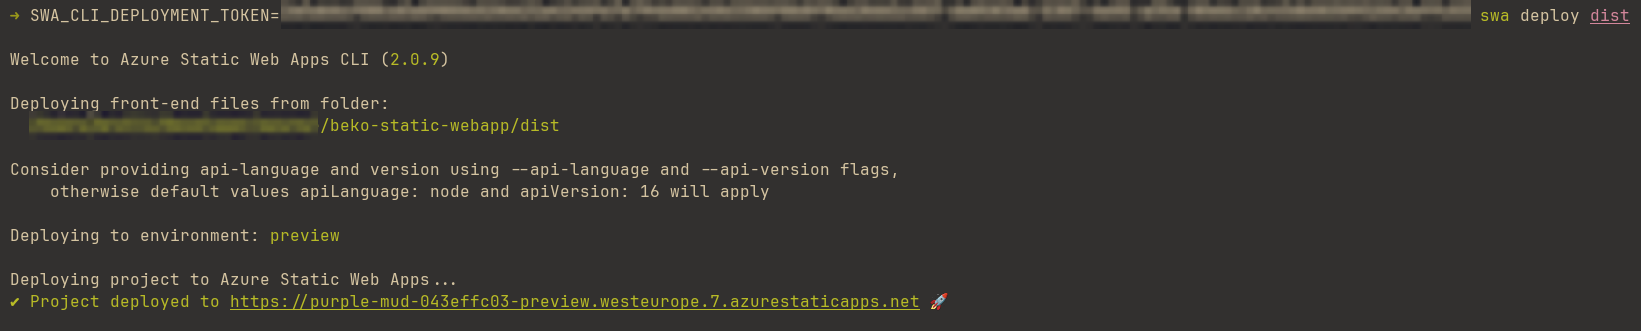
As is apparent, by default the publication targets a preview environment. Under this preview URL the contents can be inspected and reviewed before they are made publicly available. A publication to the production environment is performed as follows:
SWA_CLI_DEPLOYMENT_TOKEN=<TOKEN> swa deploy --env production dist

It is to be noted that the desired environment must be explicitly specified
with the --env production option.