Privileged Identity Management (PIM)
Privileged Identity Management (PIM)
Section titled “Privileged Identity Management (PIM)”Elevated privileges can be activated independently via PIM. This behavior follows common security standards. By default, the least privileges are used (the so-called Least Privilege Principle) and only increased when the work requires it.
In Azure, there are two types of PIM:
-
PIM-Enabled Groups
For a set period, a person is added to an Entra Group, through which extended privileges are temporarily granted. A PIM-Enabled Group can only be administered by IT services.
-
PIM for Azure Resource Roles
For a set period, an Azure resource role with elevated privileges is assigned to a person.
On both paths, extended privileges can be temporarily gained.
Activating PIM-Enabled Groups
Section titled “Activating PIM-Enabled Groups”-
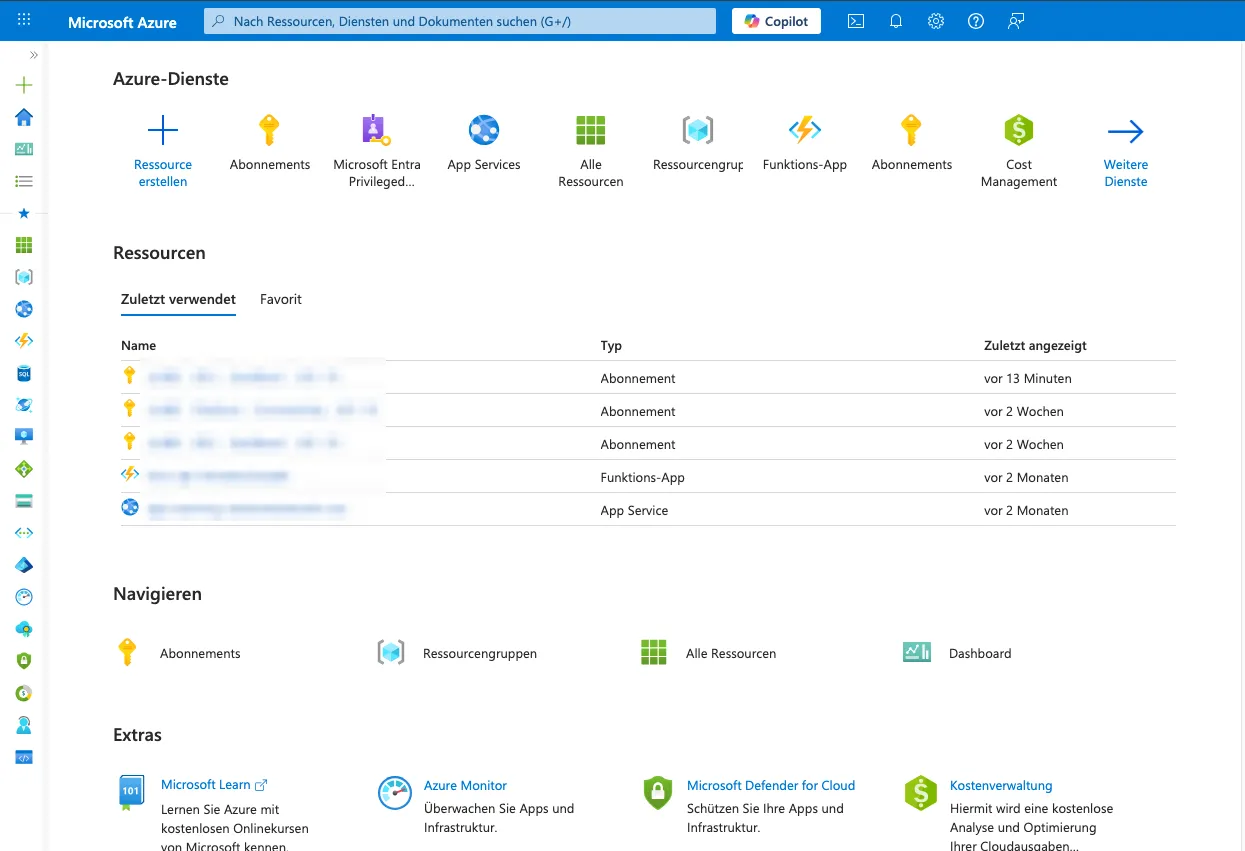
The Portal is logged into.
-
Navigate to the
PIM-Module.PIMis entered in the search bar and the search resultMicrosoft Entra Privileged Identity Managementis selected.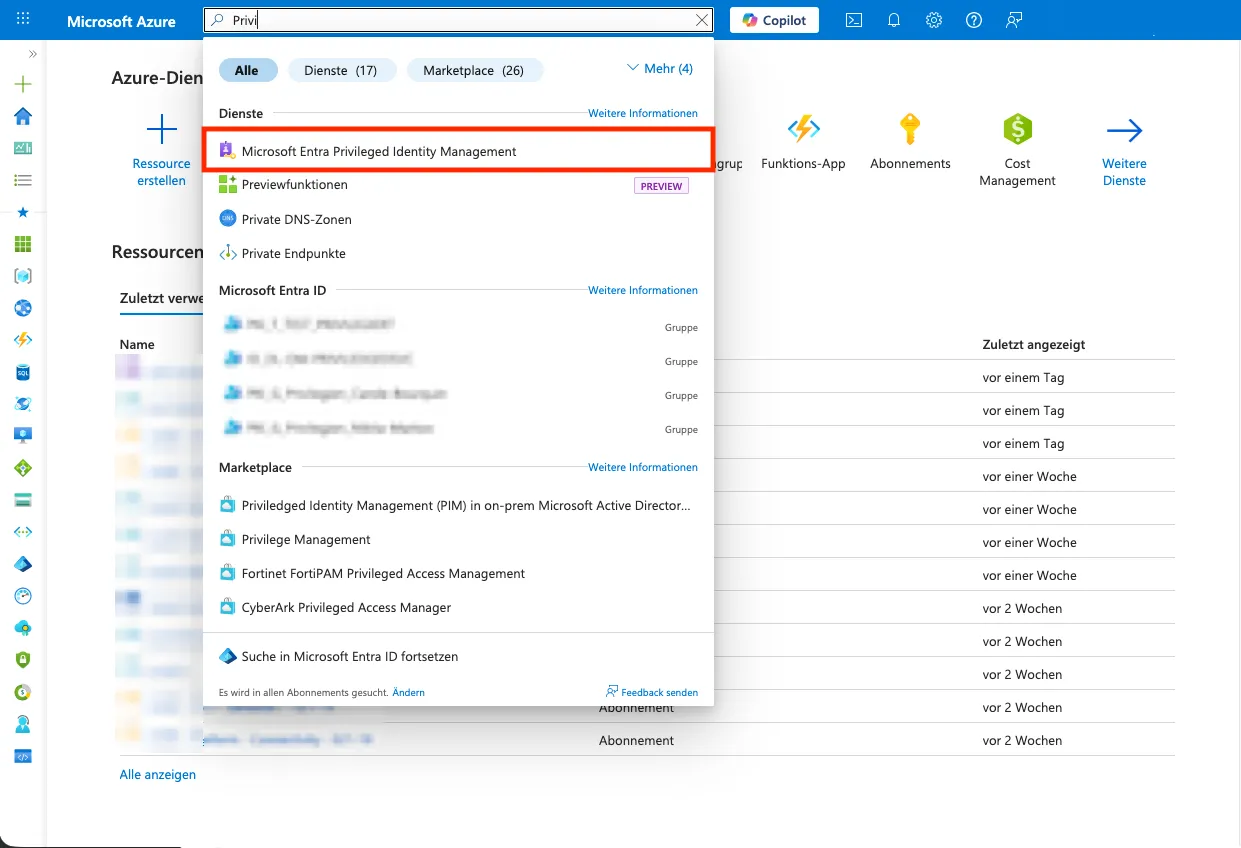
-
In the
PIM-Module,My Rolesis selected underTasksin the left menu.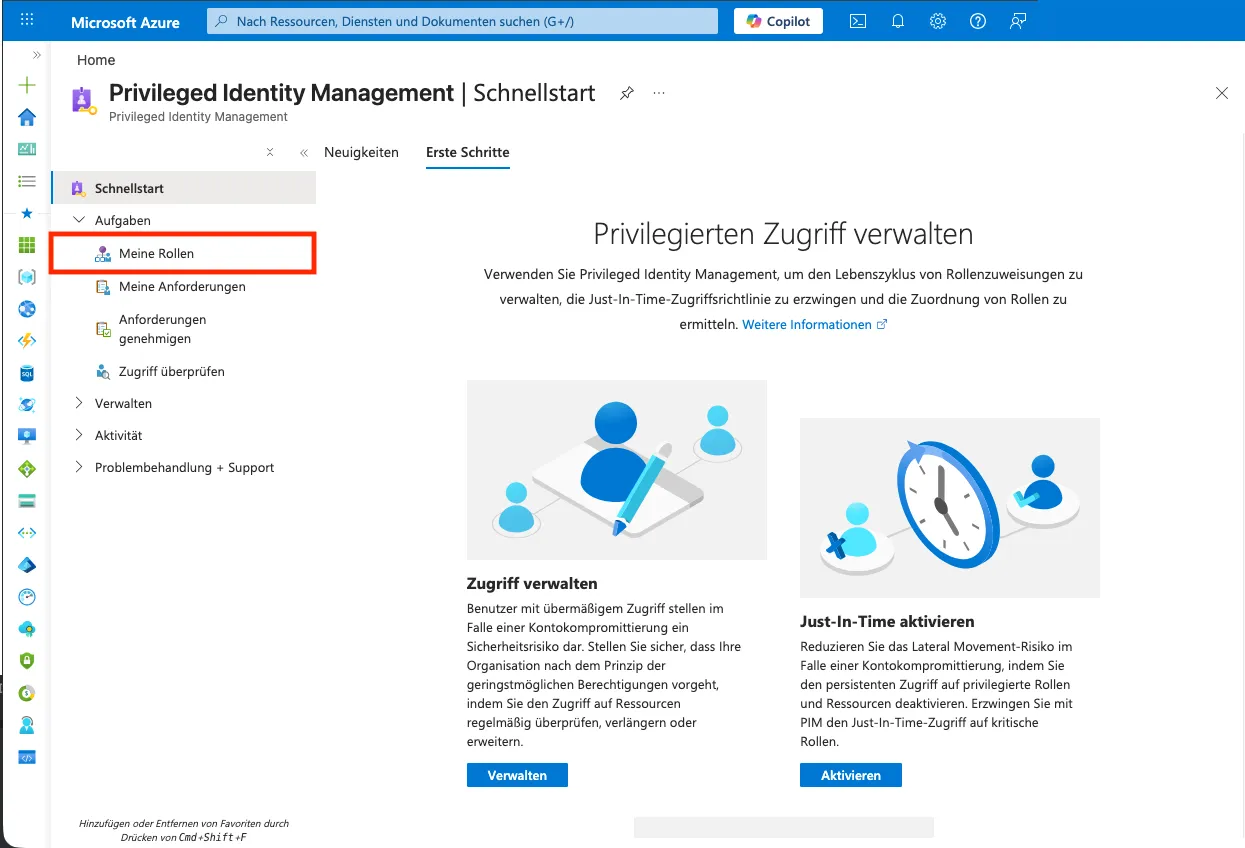
-
Groupsis selected in the left menu.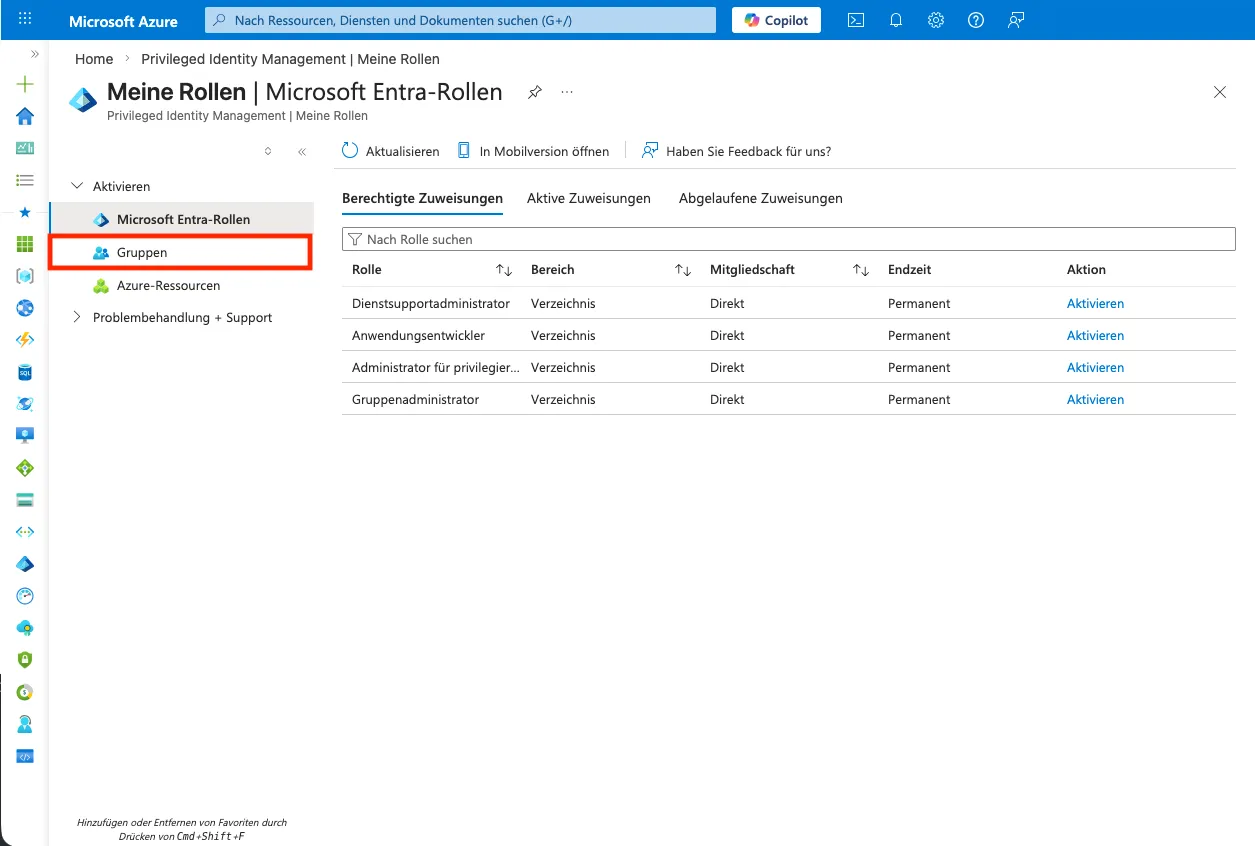
-
In the list of PIM groups, the role assigned to the subscription is activated with
Activate.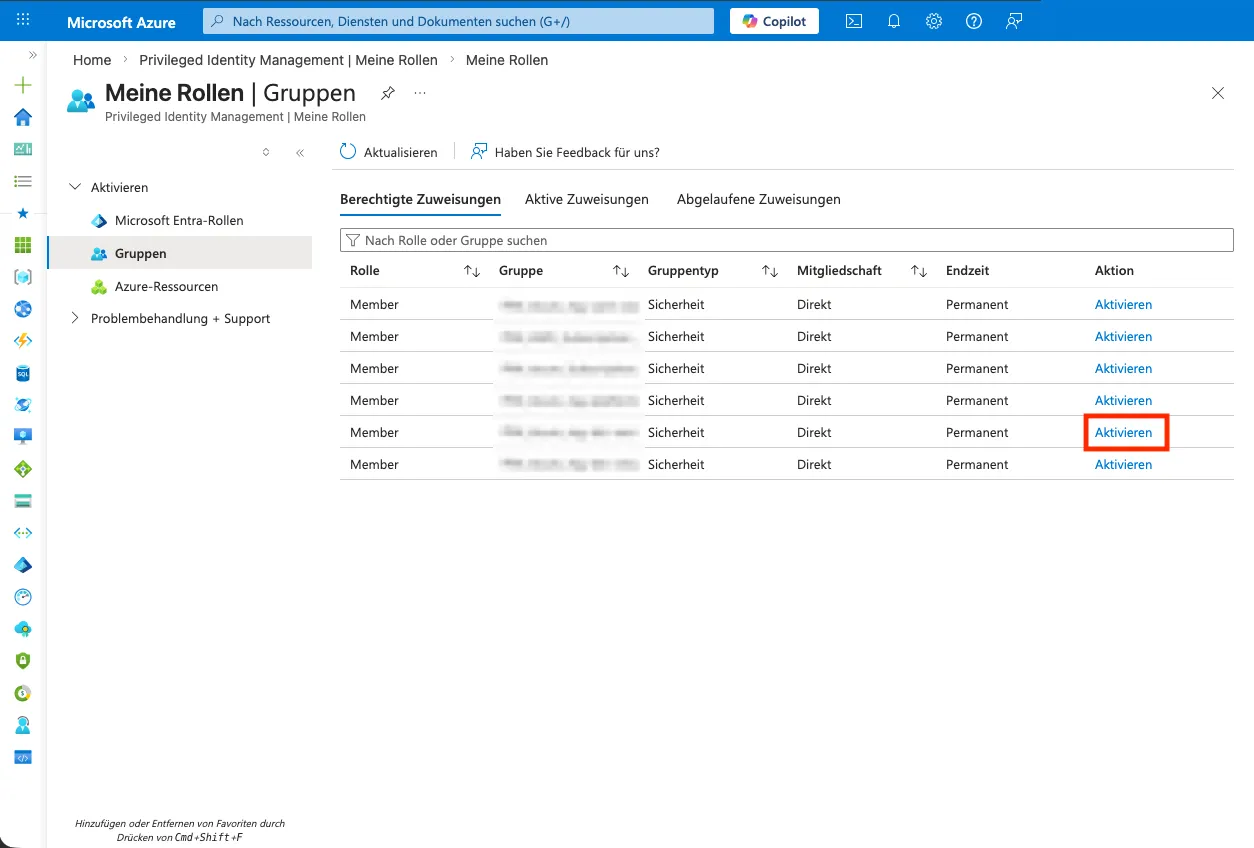
-
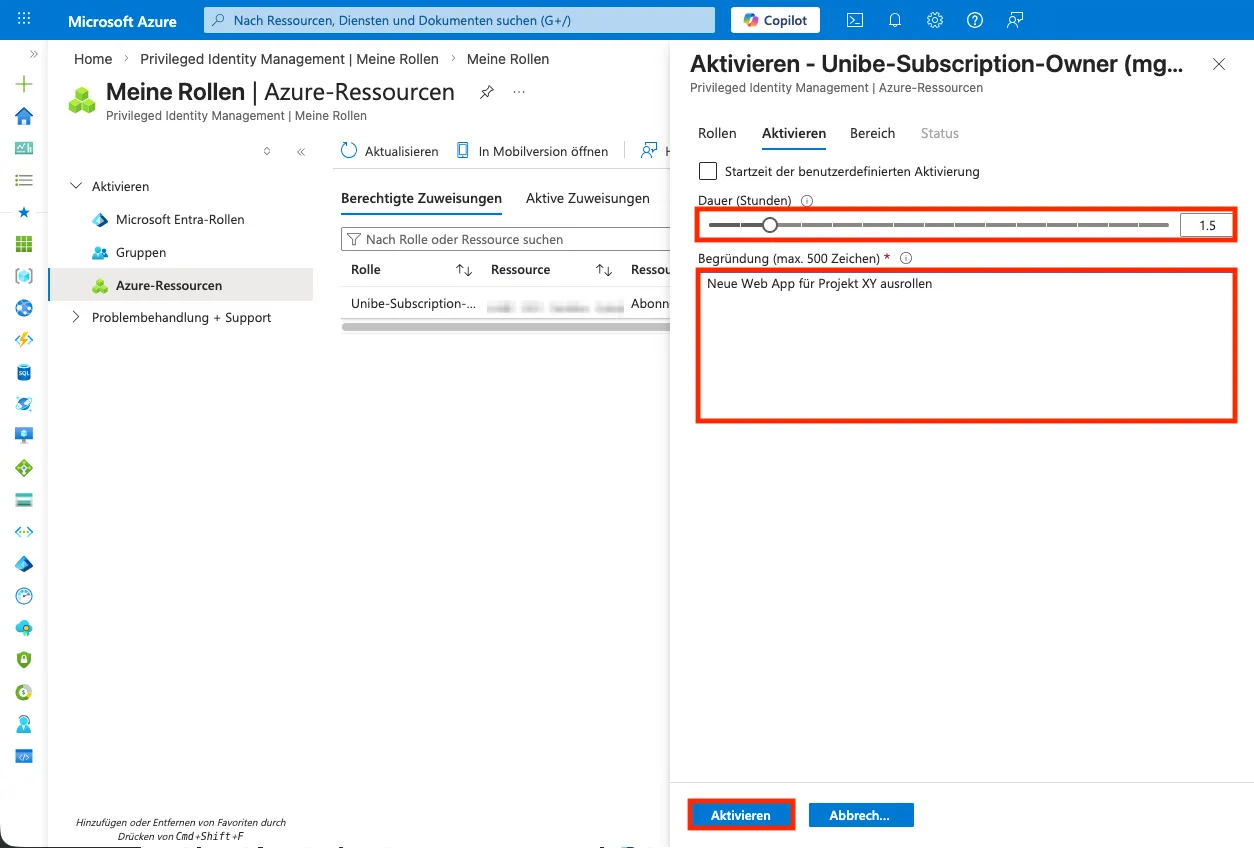
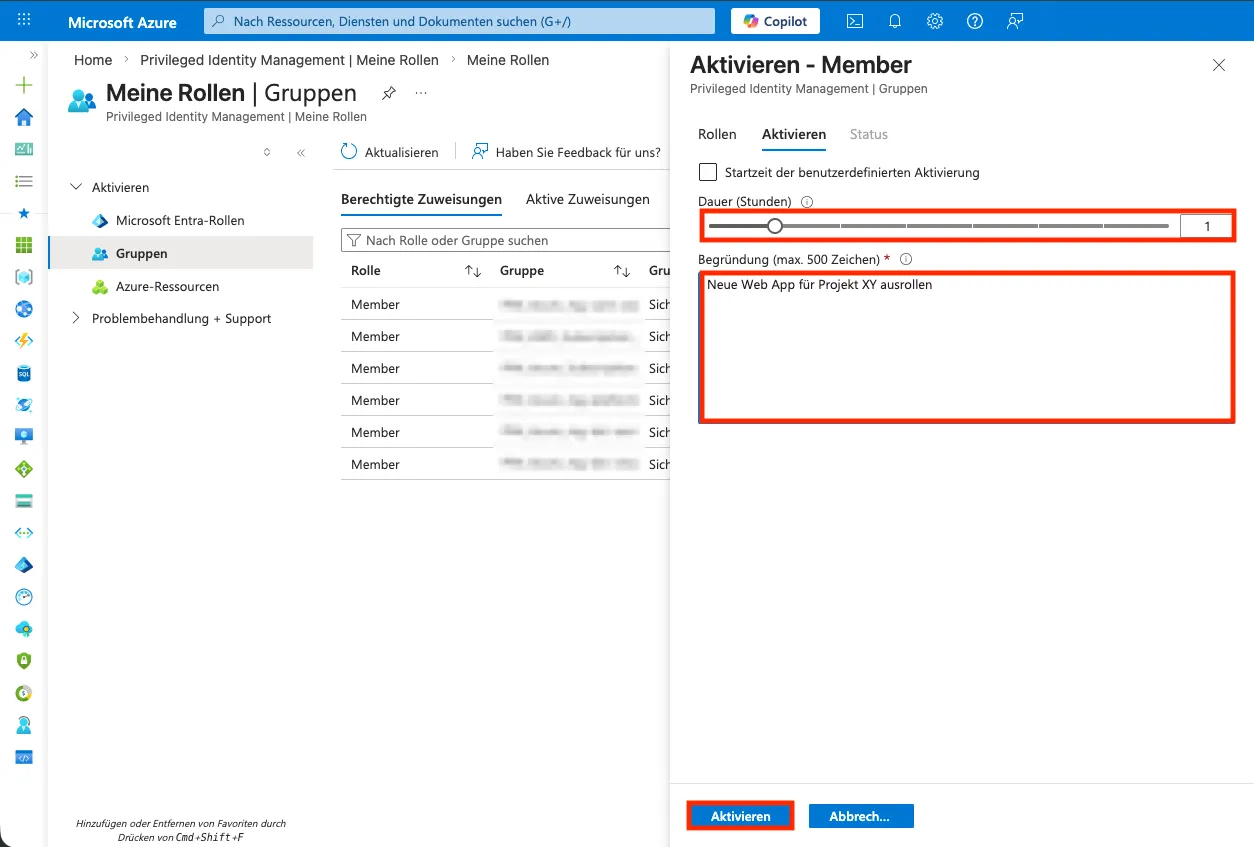
The activation duration and a justification are entered.
Activating PIM for Azure Resource Roles
Section titled “Activating PIM for Azure Resource Roles”-
The Portal is logged into.
-
Navigate to the
PIM-Module.PIMis entered in the search bar and the search resultMicrosoft Entra Privileged Identity Managementis selected. -
In the
PIM-Module,My Rolesis selected underTasksin the left menu. -
Azure Resourcesis selected in the left menu.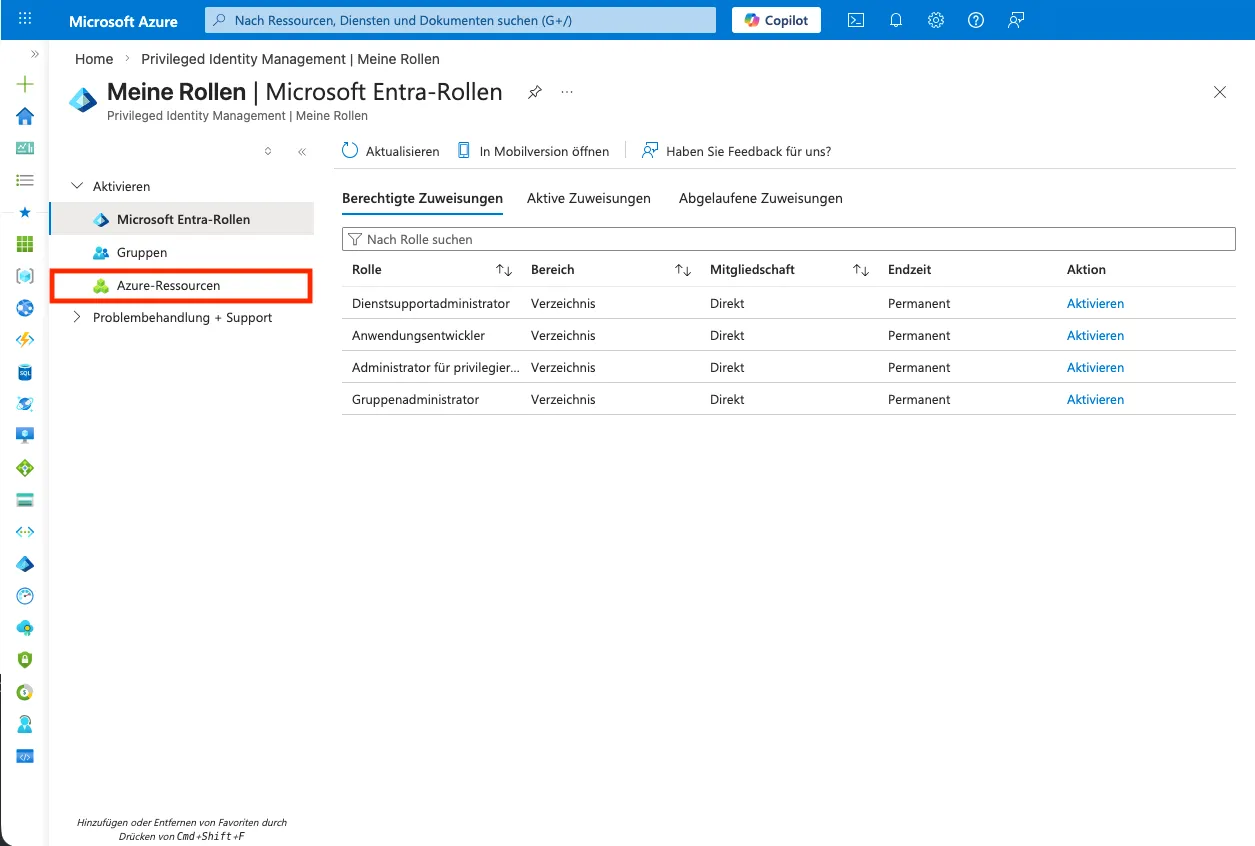
-
All roles that can be requested are listed. The
Activatebutton in the last column of the table is selected.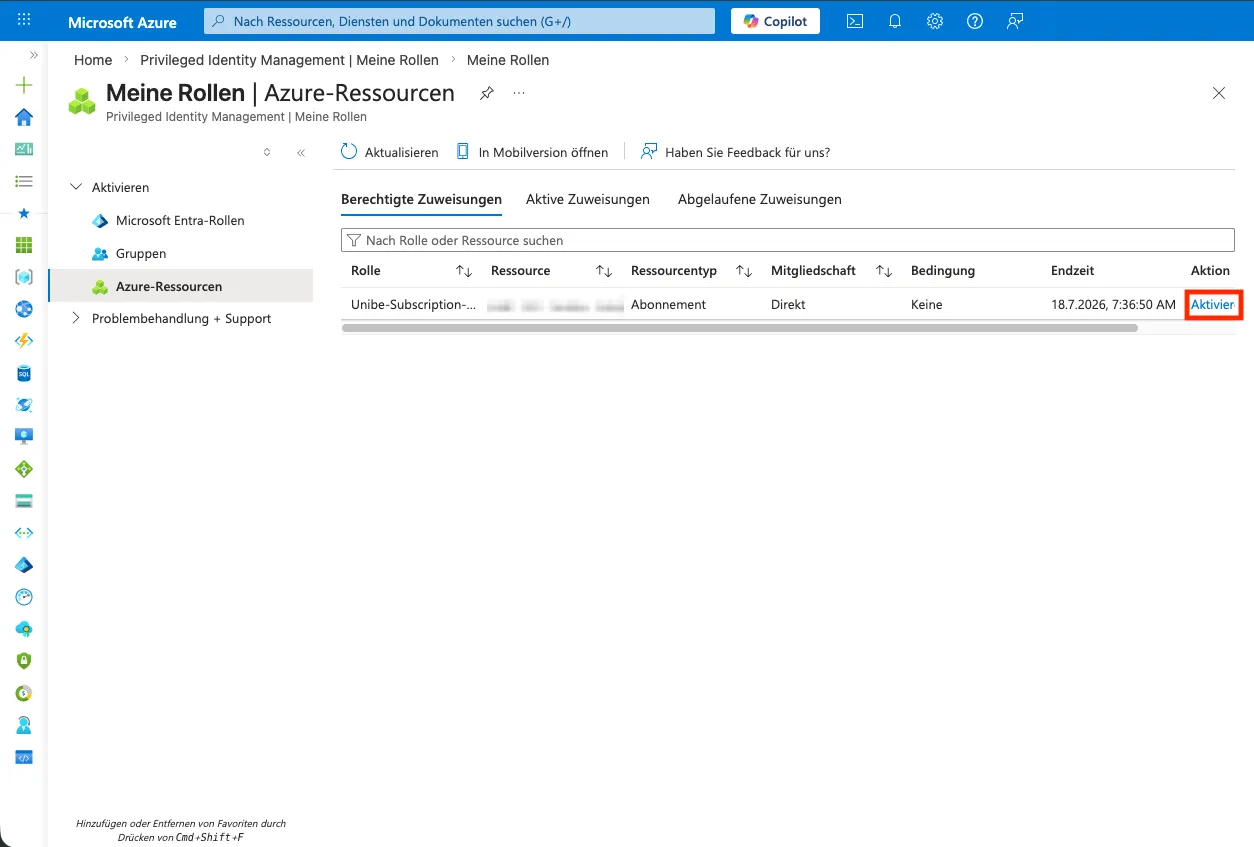
-
The activation duration and a justification are entered.