Permissions
Permanent Role
Section titled “Permanent Role”Before a role can be assigned, the resource on which the permission is to be granted must first be navigated to. In this guide, additional rights are granted directly on the Subscription.
-
Log in to the Portal.
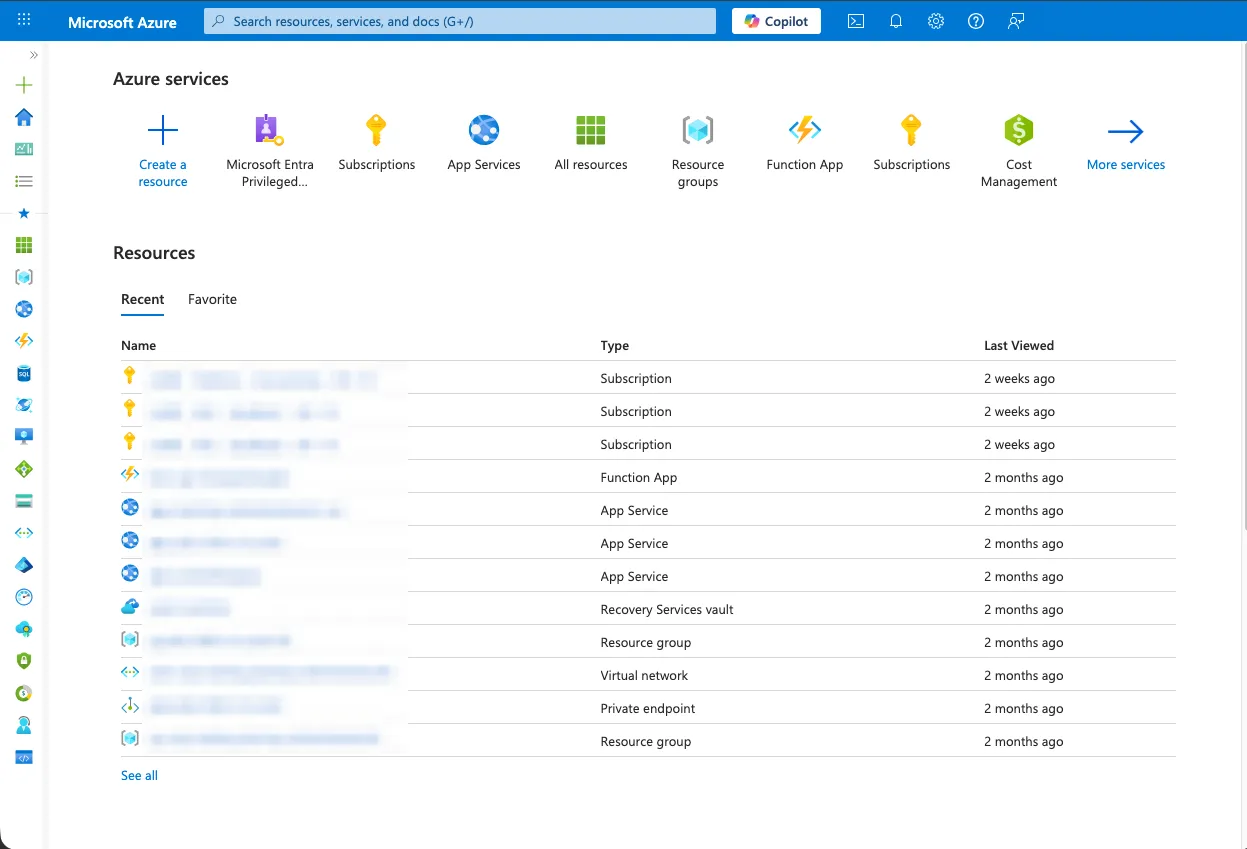
-
Navigate to the Subscription.
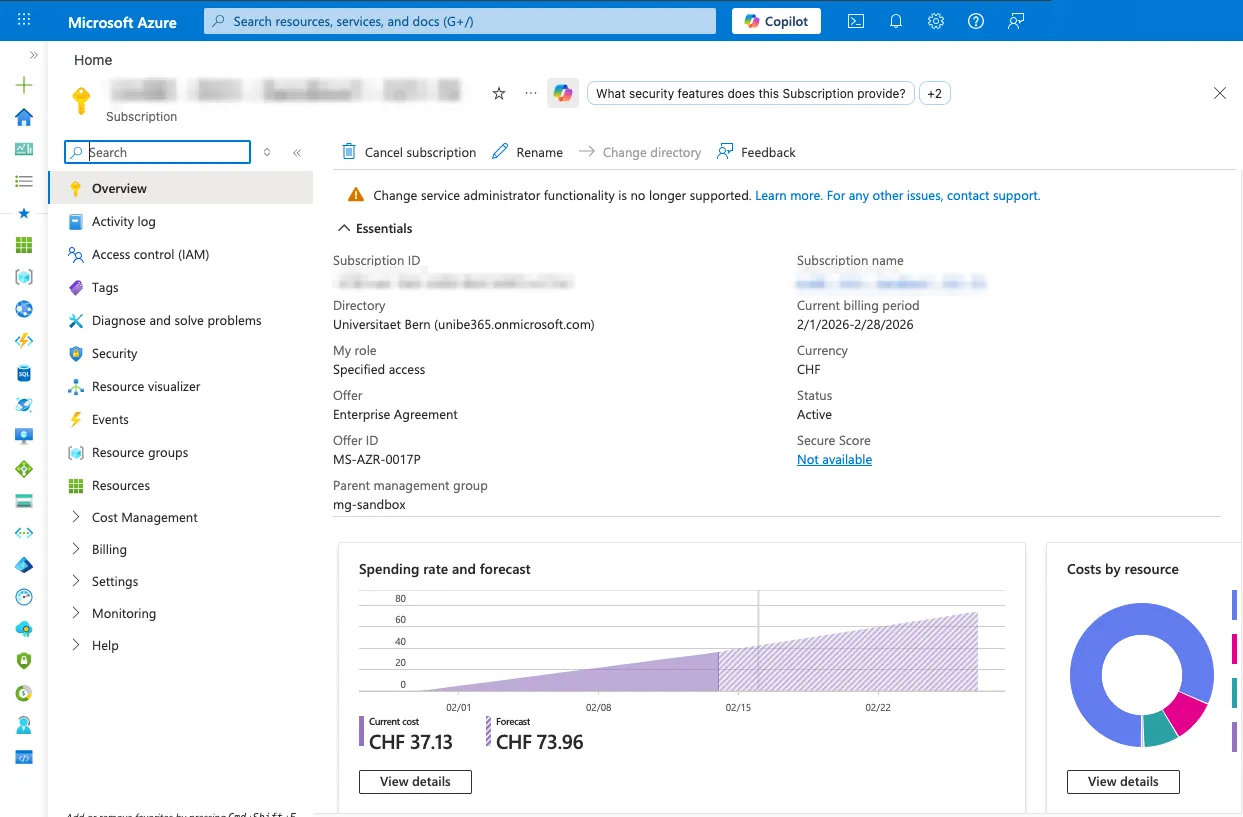
-
Select
Access control (IAM)in the left menu.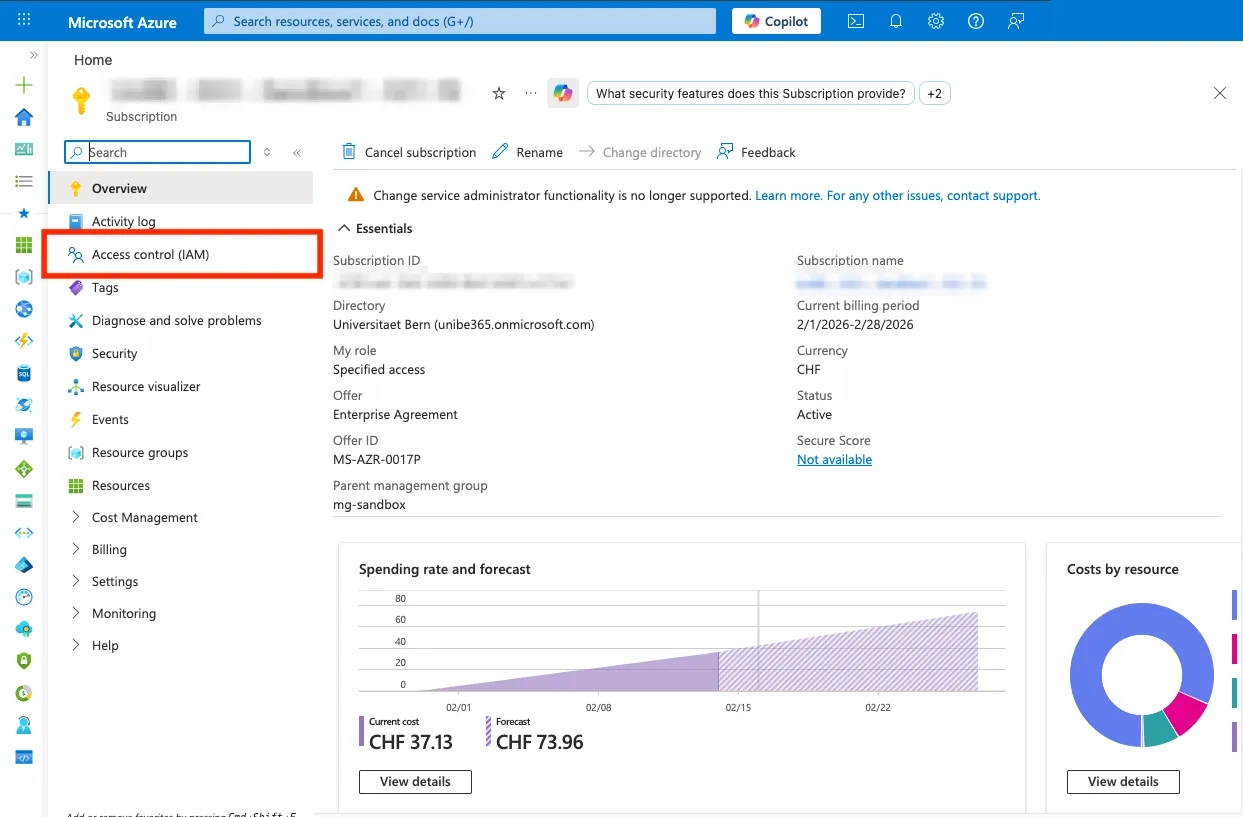
-
Select the
Addbutton and thenAdd role assignment.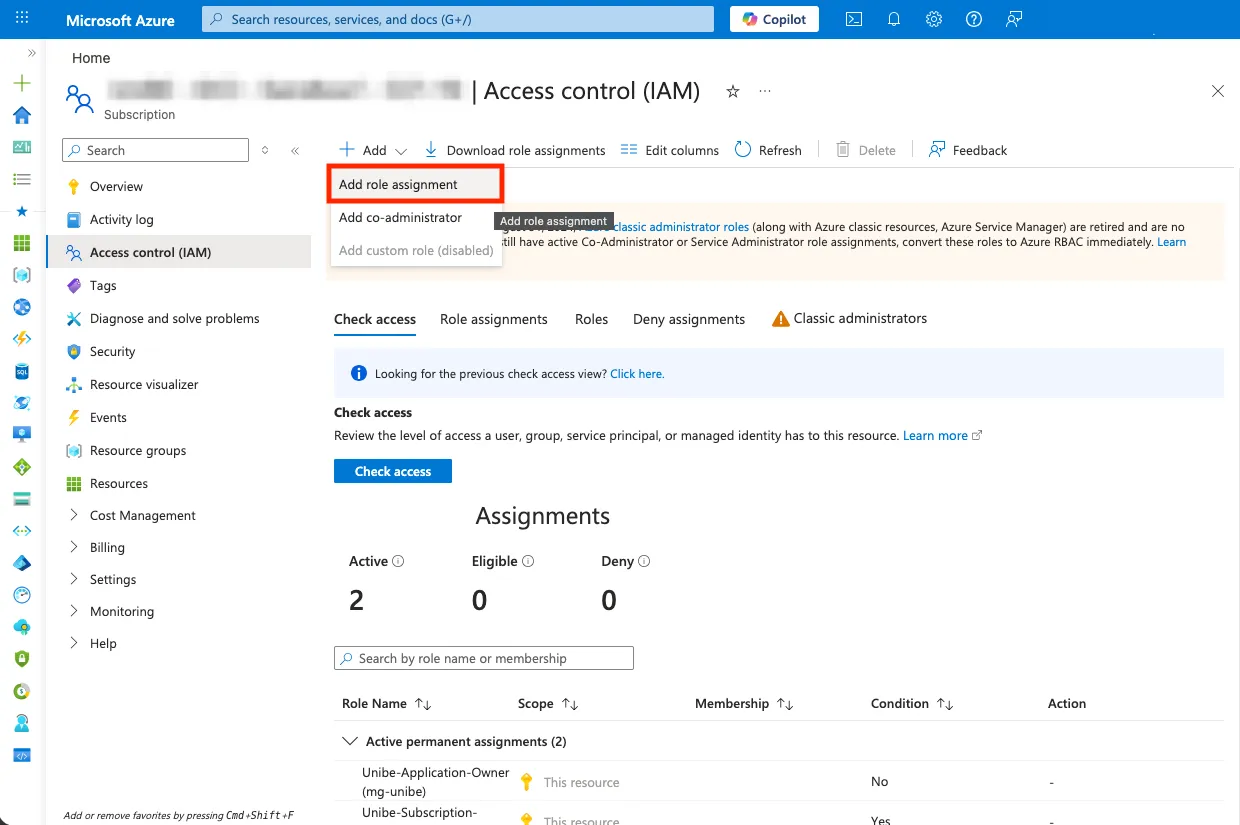
-
In the
Roletab, select the desired role. In this example, another user is granted access to all resources within a Subscription. The role can be found underPrivileged administrator roleswith the nameUnibe-Application-Owner (mg-unibe). Then selectNext.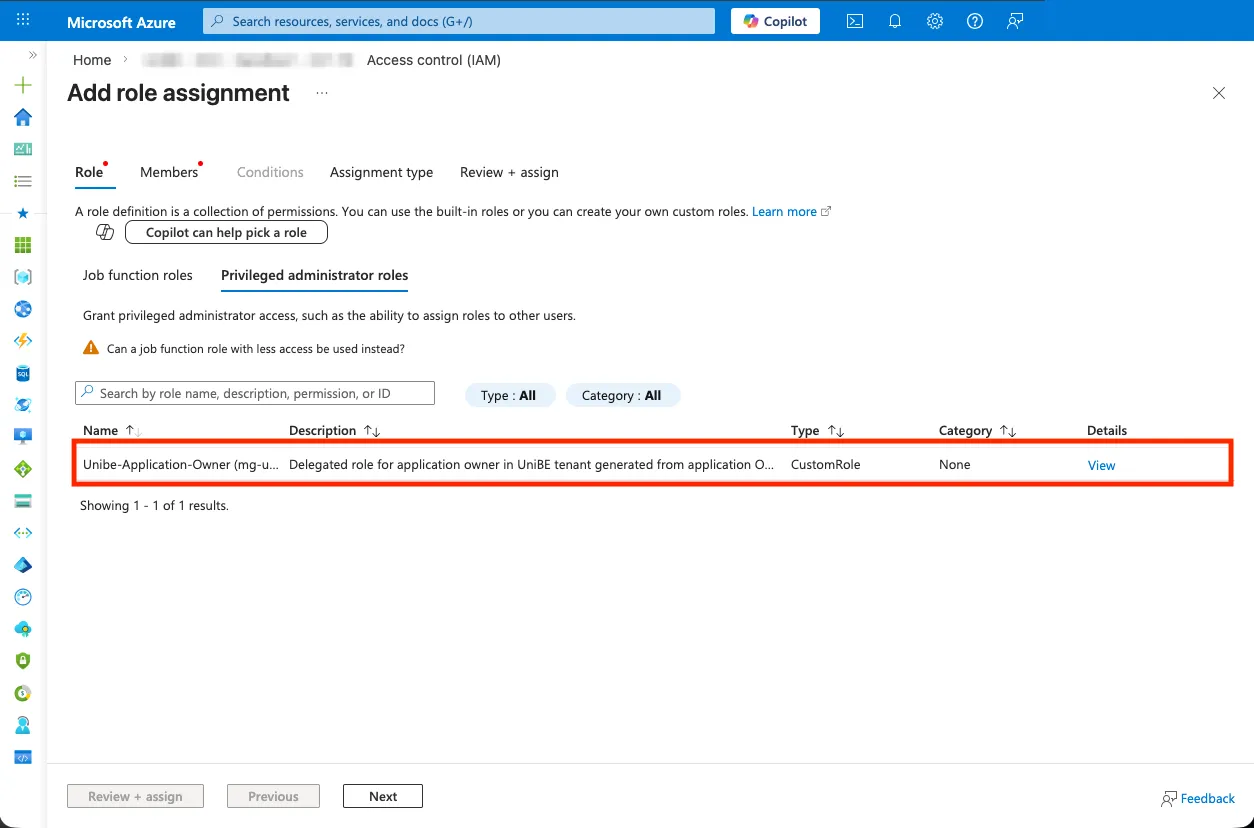
-
In the
Memberstab, select the user. SelectSelect Membersand choose the person in the popup. Then selectNext.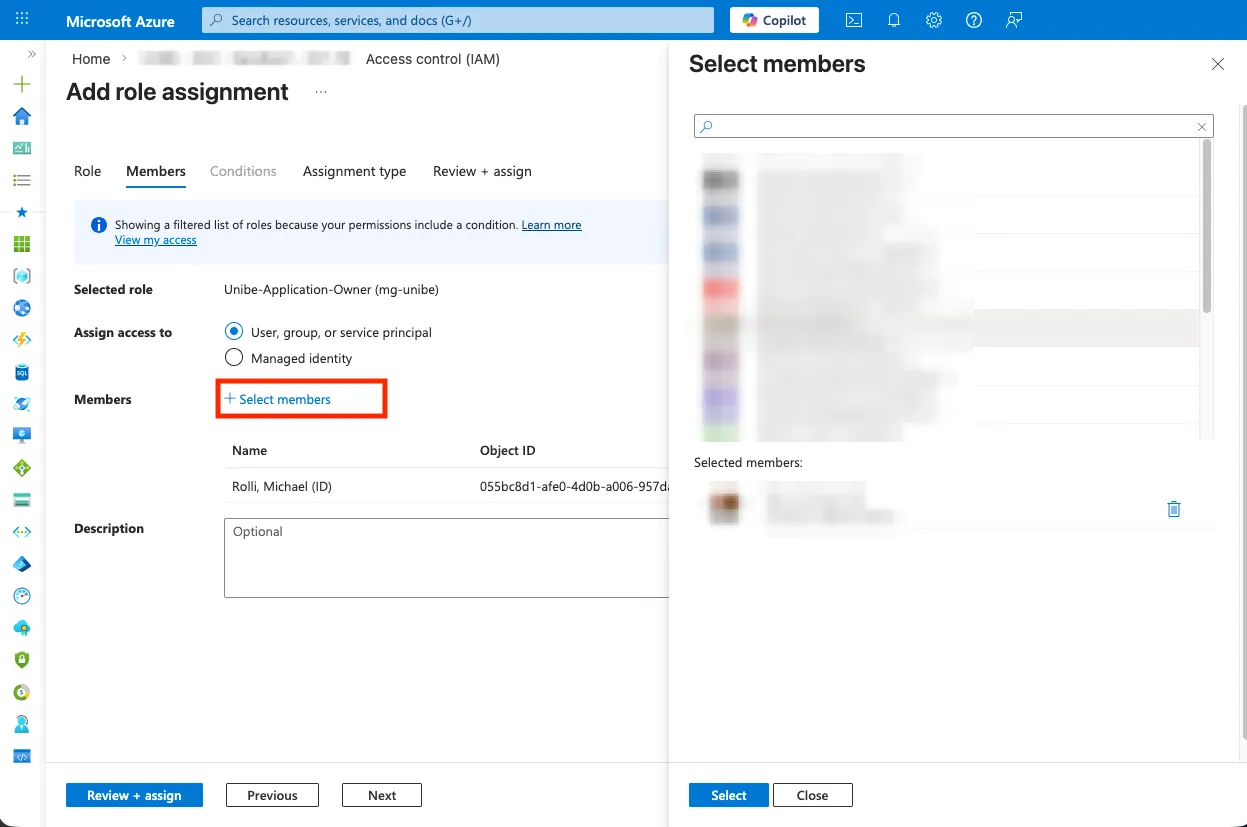
-
In the
Assignment typetab, additional conditions for the role assignment can be set. In this example, the role is assigned permanently. UnderAssignment type,Activeis selected and underAssignment duration,Permanent. Then selectReview + assign.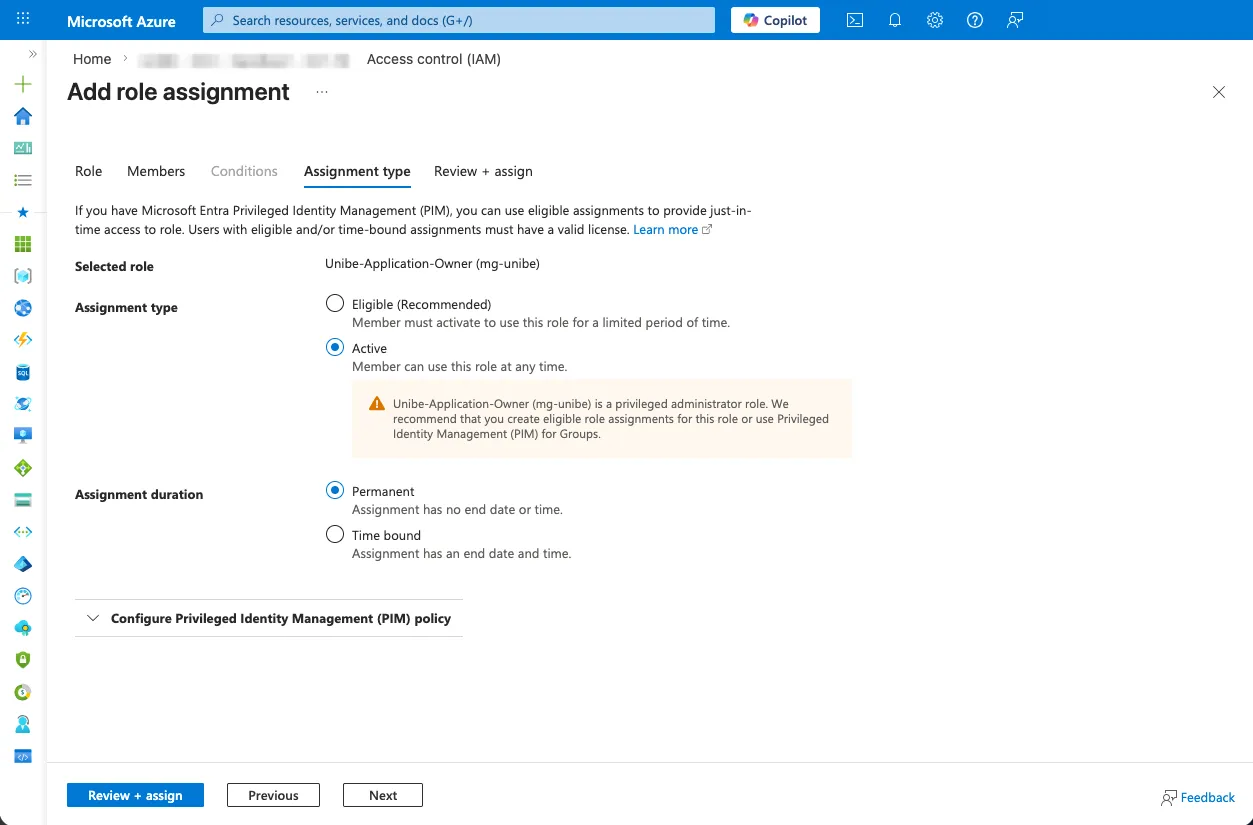
-
Review the details and select
Review + assign.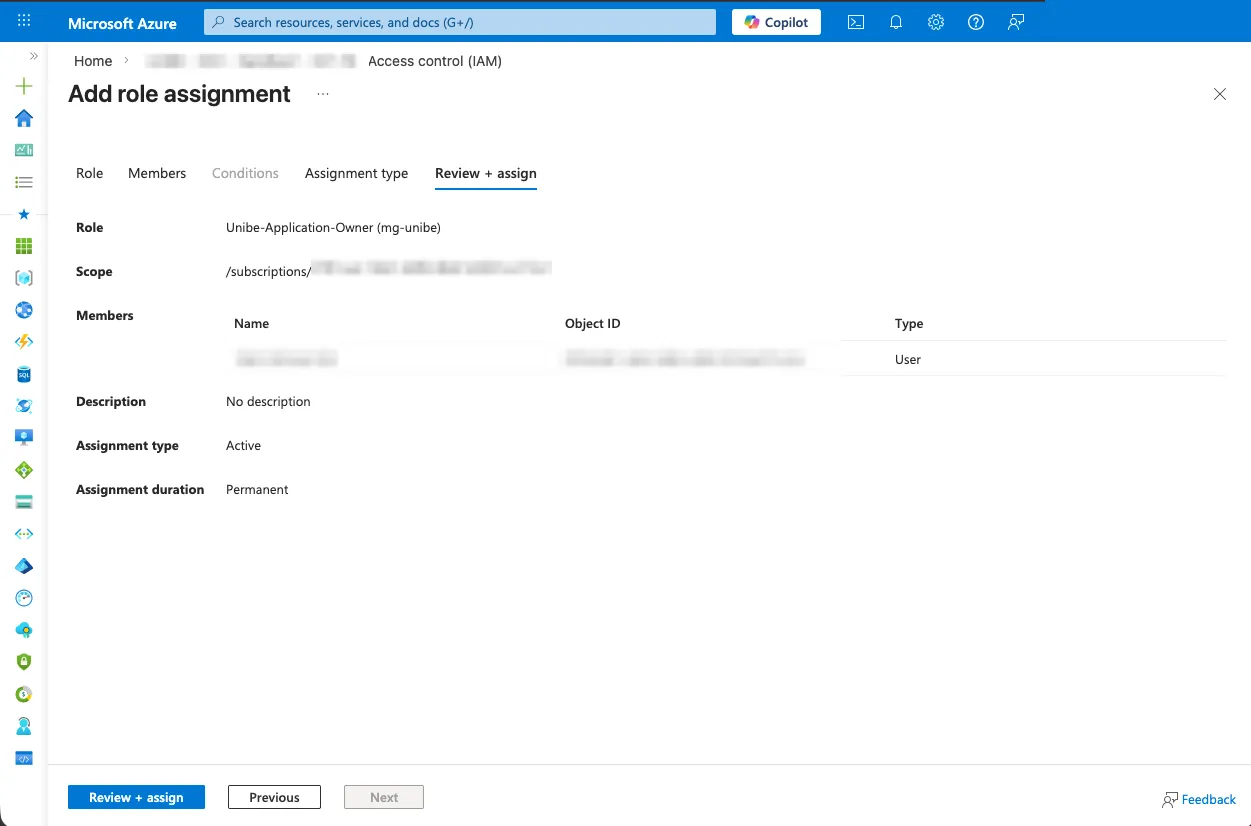
Role On Request
Section titled “Role On Request”In the previous example, a permanent permission was granted. A role can, however, also be assigned with additional conditions:
- A role can be assigned for a specific period of time.
- A role can be assigned so that it must first be requested (similar to the PIM group for Subscription owners).
-
Log in to the Portal.
-
Navigate to the Subscription.
-
Select
Access control (IAM)in the left menu. -
Select the
Addbutton and thenAdd role assignment. -
In the
Roletab, select the desired role. In this example, another user is granted access to all resources within a Subscription. The role can be found underPrivileged administrator roleswith the nameUnibe-Application-Owner (mg-unibe). Then selectNext. -
In the
Memberstab, select the user. SelectSelect Membersand choose the person in the popup. Then selectNext. -
In the
Assignment typetab, additional conditions for the role assignment can be set. In this example, the role is assigned on request. UnderAssignment type,Eligible (Recommended)is selected and underAssignment duration,Time bound. Then the validity period of the role assignment is defined. The validity period determines the time frame during which the role can be requested. Then selectReview + assign.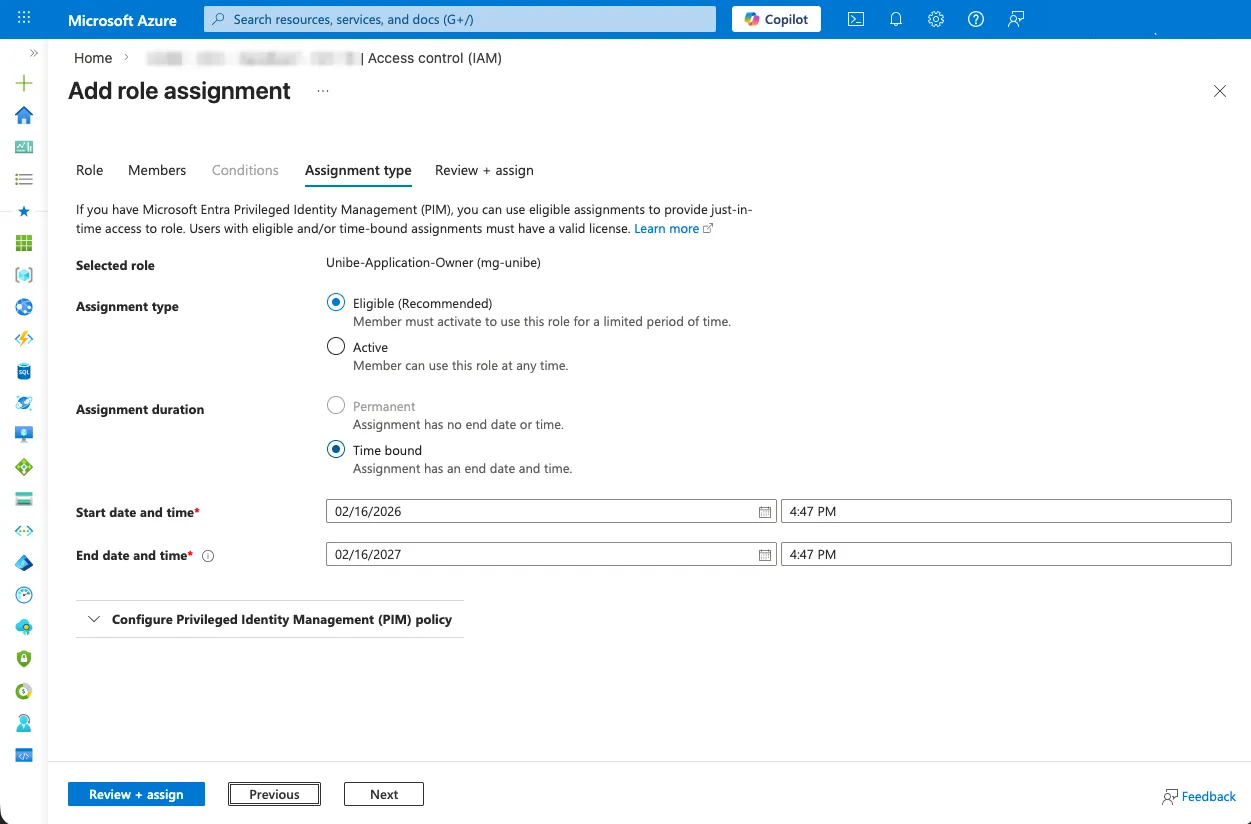
-
Review the details and select
Review + assign.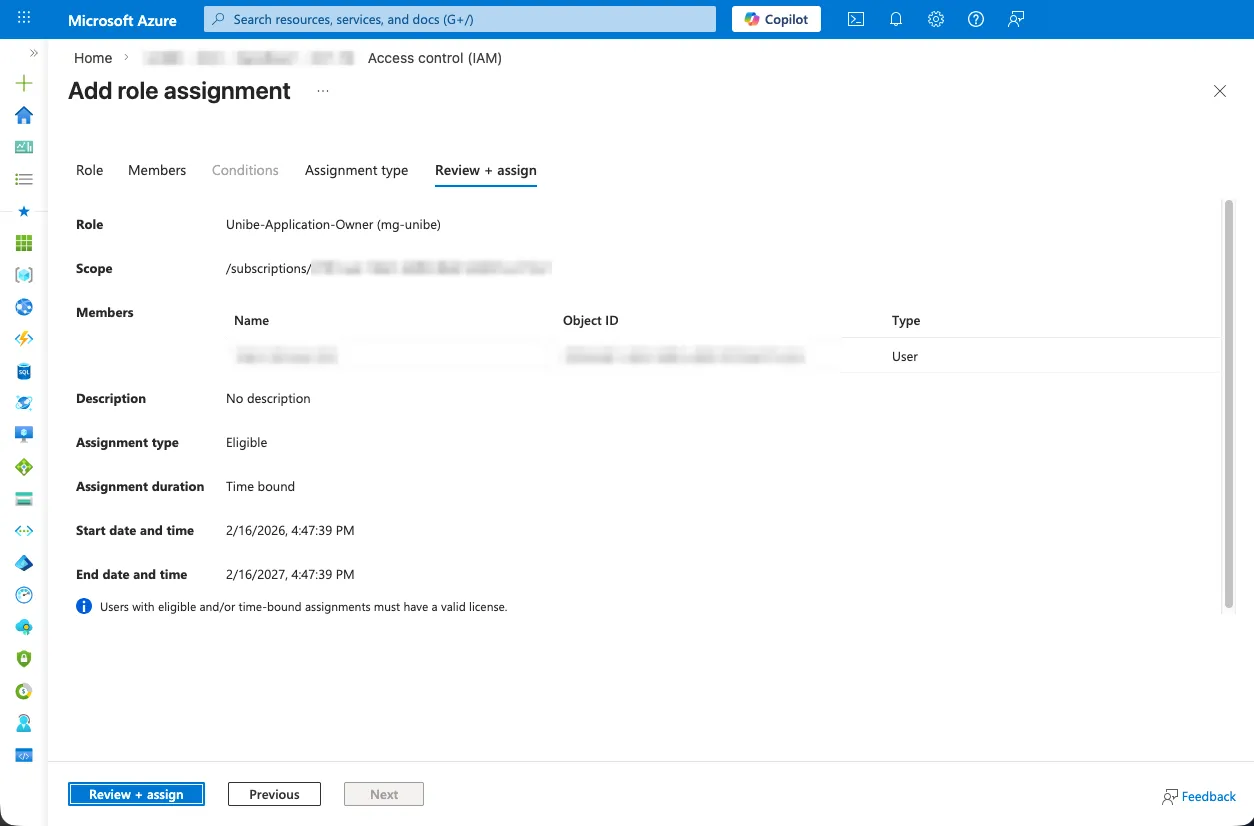
Requesting a Role
Section titled “Requesting a Role”How to request a role is described in the PIM tutorial.